
 |
| Flutter Sleeve Dress |
My goal for this school year was to have at least 3 handmade things for her to wear the first week of school and I did it, barely. :) Here is the last thing I made, but certainly my favorite. I made it in one evening.
It was super easy and quick.
 Go here to Lil Blue Boo for basic instructions on how to construct the chest band, and dress... then come back here for the flutter sleeve straps. If you are using fabric with little stretch, I do recommend adding at least 2" to the chest measurement or making sure they take a deep breath when you measure since there will be no closure and this is gonna just slip over their head. You want to make sure it will be comfortable.
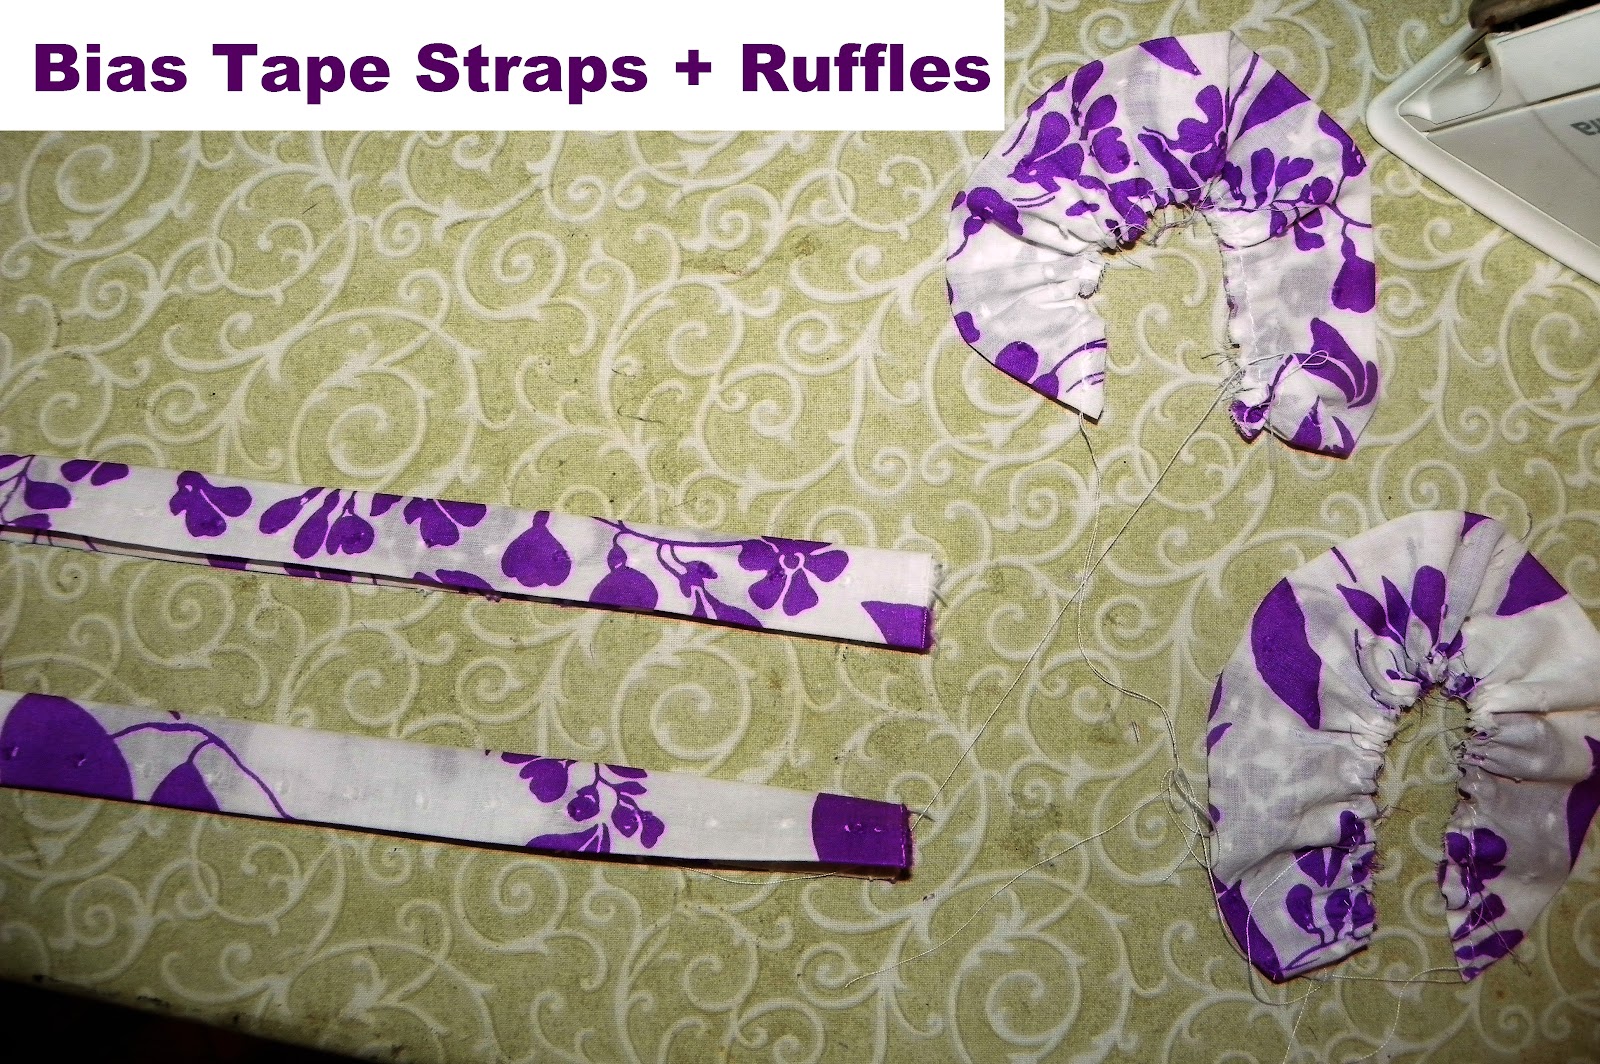
My straps were about 12 inches long and 3.5 inches wide. Iron the width in half then open and fold the edges to the center and iron then fold in half again. You are basically making bias tape (just not on the bias). Next cut two strips 7 inches by 3 inches for the ruffles. Then you will cut a curve to the cut edge and sew a basting stitch on the open side. Go to my flutter sleeve tutorial here for details and pictures on how to make those.

Pin those little ruffles inside the straps. Sew down both sides of the straps.

Try it on your little girl. Pin in place. I pinned mine about 2 3/4 inches from center front and back. Next top stitch around the top of the dress. Then clip off any extra length on your straps below your stitching.
Lastly, I added a fabric flower pin I made using this tutorial, here. I used white cotton hot glued to a felt base. I did make it a pin rather than sewing it on because I figure he dress is going to get a lot of washing, probably more than that little flower will be able to handle.
 |
| Perry Jayne |


1 comment:
Thank you so much for this post. I want to let you know that I posted a link to your blog in Creative Busy Bee Craft Inspirations, under the Page 3 post on Aug. 21, 2012. Thanks again.
Post a Comment